So you’ve decided to do it. You’re going to visit that new lake everyone has been talking about. Or perhaps, you’re finally going to give stillwater fly fishing a try. With your decision made, your next step should be to focus on your approach.
Pre-Planning
Before leaving the driveway, much of the groundwork for success should be in place. Investing the time to plan and prepare pays huge dividends as you gain a mental picture of the lake and its surroundings, while building a plan and approach to make efficient use of your time on the water. Begin by canvassing friends and colleagues who might have visited the lake. What time of the year did they visit the lake? What hatches or invertebrate activity did they observe? What areas of the lake produced best? What structural elements held fish, such as weed beds, shoals, points, and drop-offs? Practical questions are also worth asking. What was the shape of the road going in? How are the launch facilities? Local fly shops and sporting goods stores are also good sources of information.Writing out a series of questions on paper is wise. During an unplanned conversation questions can be forgotten necessitating a second or third phone call or, worse, overlooked completely.
The Internet provides a wealth of information. Grab a cup of coffee and check out local online forums. Consider placing a post detailing your questions and quest for information. Most forum followers are more than helpful. Some forum members may not provide detailed information for risk of exposing their hard earned secrets, but they might provide additional information such as fly pattern preferences and recipes via private message or direct email.
On-line Maps and Charts
With the advent of programs such as Google Maps and Google Earth scouting a location is so much easier. Google Maps offers a graphic view of an area, including a dimensional representation of the local terrain. These helpful features give you an idea of the local topography surrounding a lake, which provides clues to the lake bottom below. Gentle slopes indicate shoal areas with shallow grade extending into the lake. Smothered in sunlight, these areas are often home to lush weed beds full of aquatic invertebrates and baitfish. Steep sided shorelines offer minimal shoal area, as they drop quickly into deep water.
Google Earth provides satellite pictures of many lakes across North America. The default view helps you locate various underwater structures such as sunken islands, drop-offs and shoals. You can also zoom in for a macro perspective of different areas of the lake. Dragging the “Street View” icon onto the map provides a horizontal view of the lake as though you were sitting in a boat. Panning 360 degrees gives a view of the surrounding topography and physical features. The “Tour Guide” feature displays a series of images, detailing views, not only of various lake features, but also of the surrounding countryside. Both Google Earth and Google Maps display road information which is helpful in locating access roads and potential launch areas.
The Internet also provides access to bathymetric or underwater contour maps. Bathymetric maps provide important depth and structure information. The contour lines on the maps join areas of similar depth. Lines that are close together represent a rapid change in depth, such as a drop-off. Wide apart contour lines indicate a gradual depth change, indicating productive shallow shoals. Points of land and sunken islands are other features to look for. As I study and identify various lake features, I note them down to help create a route map that forms a basis for my attack plan.
Some provincial and state agencies provide access to these maps, many of which can be downloaded as images or PDF’s. A simple inquiry such as, “Bathymetric maps for Lake….” in your web browser will focus your quest. One of my favorite resources is Anglers Atlas (www.anglersatlas.com). This is an excellent on-line source of bathymetric maps, with over 80,000 lakes listed across Canada and the United States. By becoming a member (membership is free) you can download PDF copies of the lake you are researching. I download and print a copy and place it in a protective clear plastic sleeve which I take with me on the water. After studying the map place it into a binder for future reference.
There are also a number of excellent regional map books and guides available. These books and guides often contain bathymetric maps, stocking reports, recommended fly patterns and presentation tactics. If a publication for the lake or region you are planning on fishing exists, make a point of picking up a copy.
After your home investigation is complete you should have a better idea of the lake’s features—the surrounding topography, locations of weed beds, shoals, sunken islands, access points, launch areas, and lake depth. Each of these factors should be integrated into your approach to give you an idea of what places you are going to explore when you get on the water.
Starting Out
Once you arrive avoid the temptation to scramble onto the water. Invest the time to get a measure of what is going on. Integrate what you observe with the preparations you made prior to leaving home. Take out your bathymetric map and any other maps and information you may have brought with you. Look at the surrounding features adjacent to the lake and match everything up.
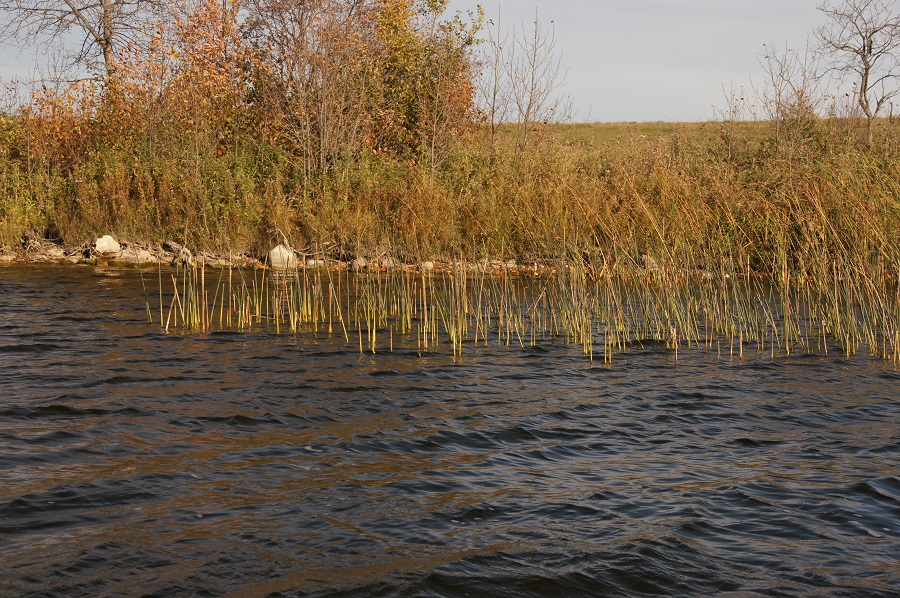
Next, take a few minutes to explore the margins. Look into the water to see what invertebrates and other forage creatures might be active. A small aquarium net is helpful for catching specimens for closer examination. Use the aquatic vegetation as a color guide for flies, as all aquatic food sources tend to match their surroundings. Turn over rocks and logs to see what is under them—leeches, dragon nymphs and scuds often take refuge in the cracks and crevices of rocks and logs. Check any emergent weeds, such as cattails or long-stem bulrushes, for signs of an emergence. Dragon and damsel fly nymphs crawl from the water to complete their transformation to winged adult, leaving cast husks on the shoreline vegetation. Check spider webs for adult insects, such as mayflies, caddis, damsel flies and chironomids, which often end up as spider fodder. If it’s recently been wind, you’ll often find foam lines along the shore, which collect and gather food. White foam offers stark contrast, making it easy to see any trapped food sources or their cast shucks.
A basic knowledge of stillwater entomology helps in identifying creatures, enabling you to choose the correct pattern and present it properly. Always base your pattern choice and presentation tactics on what you see and what is most abundant. Above all, avoid assumptions or acting on preconceived notions.
On the Water
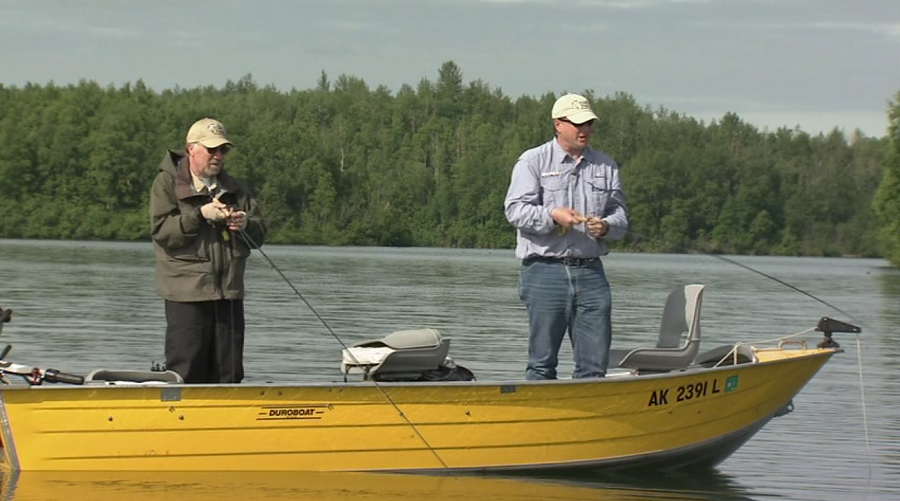
Observation doesn’t stop once you get out on the water. As you move out onto the lake, use your polarized glasses to look on and in the water for signs of invertebrate activity. If you see something, take an aquarium net to gather and inspect it. If you have a sounder, use it. Pay attention to the bottom contour and determine whether it’s rock, mud, or weeds. Note the surface temperature. As trout are cold-blooded, water temperature has a profound effect on their behavior, especially feeding activity and location.
Water temperature also governs insect activity. When temperatures reach 50F expect to see emergences. Although each trout and char species has its own temperature preference, I find that if you target water between 50-60F you should find fish. When exploring deeper water, a small streamside thermometer attached to a string allows you to check temperatures near the bottom.
One of the primary purposes of home study was the development of a logical, efficient plan. When you are on the water do your best to stick to it. If the lake is small, often you can cruise the circumference before targeting specific location, but on larger lakes this is not always practical. Exploring specific locations is the best approach. Work a spot at least 30 minutes. If nothing happens or there are no any signs to suggest trout are around, move to the next location. Should one location produce, make a point of noting what features were present and use this information in order to target similar locations.
I begin focusing on shallow water less than 20 feet deep. Sun-drenched shallows, enriched by photosynthesis, provide prime weed habitat for both fish and forage creatures. Tactically, such locations allow a wide range of presentation options—from floating lines and strike indicators to fast sinking lines coupled with buoyant bottom skimming patterns. If the shallows aren’t producing, move to the edges of shoals or sunken islands, where the proximity of a deep water sanctuary often encourages trout to patrol. If possible, work flies parallel to these structures, which ensures that the flies work the perimeter along the same path the trout are cruising. If the bottom doesn’t have a pronounced depth change, such as a drop-off, and you have reasonable water clarity, move out until you can no longer see the bottom. Trout patrol the transitional areas between light and dark, ambushing prey from the gloom.
During periods of unsettled weather or after a frontal passage, trout (especially rainbows) leave the shallows until conditions stabilize. In these situations, you have to prospect the depths. Exploring deep water is typically the last step in my progression unless I realise that trout have vacated the shallows. For example, during the summer months, shallow water temperatures can rise, resulting in reduced oxygen content, inducing fish head deep in search of cooler, oxygenated water.
Use your eyes and ears at all times to locate fish. Active, moving fish usually respond to a careful presentation. Even fish leaping clear of the water to rid themselves of parasites are worth casting to. Where there is one fish there are others. My friends and I use a two fish rule. If a fish moves more than twice in an area, we move to there immediately
Thoughts on Flies
My fly choices fall into three main categories: suggestive, imitative, and attractor. If there are no signs of any hatch activity, I begin with a suggestive pattern. Suggestive patterns tend to be buggy and scruffy, offering a variety of prey characteristics that stimulate a trout’s often opportunistic nature. Woolly Buggers are an excellent choice. Suggestive patterns can also be used with a variety of retrieve speeds and, consequently, make excellent searching patterns
Subtle imitative patterns are my preferred choices when trout are targeting a specific food source or when I’m exploring clear water. When trout are selectively feeding, factors such as pattern shape, size, and color come into play. This is often the case when trout are fixated on chironomid pupa. In these circumstances having a pattern to match the naturals is the key to unlocking the puzzle.
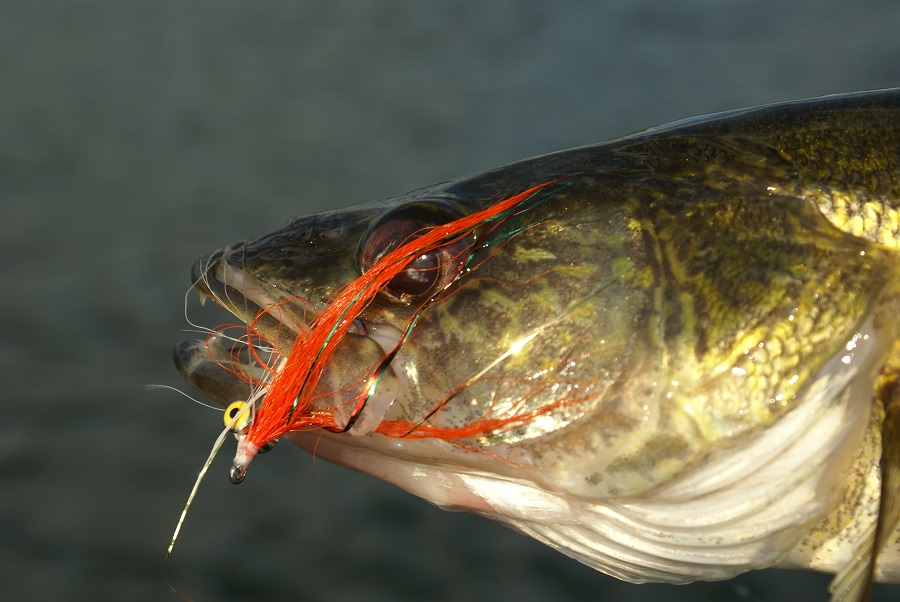
Attractor flies trigger a trout’s natural predatory nature. Flies in this category are often loud and gaudy. Soft, mobile materials such as rabbit or marabou, are common pattern components along with flash and garish body colors, which should be fished at pace to draw an aggressive response. It’s much like a cat chasing a pulled length of string, or a that mean old dog that chased me down years ago as I rode by on my bike. In both these instances, the response was driven by reflex and reaction rather than a desire to feed. The same holds true for a trout that chases a fly as it’s worked briskly and erratically across its path.
If I know my flies are working at the right depth and I have experimented with my retrieve pace, I usually change them every 15 or 20 minutes. The slower my retrieve speed the quicker I change, as the fly stands a better chance of being seen due to its pedestrian retrieve pace. However, I feel most fly fishers place too much reliance on the pattern believing it to be the only route to success. Think DRP (Depth, Retrieve, Pattern) before contemplating a pattern change. In most instances patterns aren’t presented deep enough (they should track just above the bottom weeds and debris), or they are retrieved too fast. If I am confident that my fly is working at the right depth and pace, I contemplate a location change before swapping patterns. I recommend using multiple fly rigs where legal. Multiple flies allow you to represent different food sources, offer size and color options, and simultaneously cover a variety of depths. When using multiple flies contrast both pattern size and color. While large, gaudy mobile patterns might not induce a take, they will draw curious trout from a distance, that will then detect the smaller, imitative offerings and grab them.
During the course of an outing, I often make a number of pattern changes, particularly if fishing is tough. I cycle my flies through a small day box to keep track of what pattern sizes, colors, and styles I have tried, in order to avoid re-using a pattern or style that has not proven successful.
Summary
1. Before you head out to an unfamiliar lake take the time to canvas friends and colleagues.
2. Take advantage of all the tools the Internet has to offer. Years ago all we had was rumor and advice from friends to guide us. Now we have bathymetric maps, photos and graphics at our disposal.
3. Once you arrive, invest the time to explore the shoreline for clues as to what food sources are evident.
4. Make note of the surrounding topography to gain a measure of the lake bottom below.
5. Target shoals, sunken islands and areas of transition, such as drop-offs and weed edges.
6. Follow the attack plan you created in your pre-trip investigation.
7. Use your powers of observation to watch for feeding birds, moving fish, successful anglers, and insect activity.
8. At the end of the day make notes or, better yet, start a journal to keep track of your observations, presentation choices, successful patterns, and other lessons learned. This record will enrich your experience, lessen your learning curve, and increase your catch rate.
By Phil Rowley, host on The New Fly Fisher TV show
