If we could only get inside the mind of the fish, some important aspects of their feeding behavior, feeding preferences, and basic trigger mechanisms would suddenly become painstakingly clear to us. However, until that happens, we will have to remain satisfied brooding and speculating over what it is that makes the fish respond in a desirable manner, when presented with one of our flies. Even though it’s definitely intriguing and difficult to resist, trying to develop bulletproof theories about what characterizes the perfect fly is honestly a rather hopeless endeavor. After all, the fish do seem to have some pretty weird and inconsistent preferences from time to time. And let’s face it; fly fishing wouldn’t be half as fun, if our flies weren’t rejected now and then! Rejection gives rise to thoughtfulness and curiosity, and these blend effortlessly into – and nourish our general fascination with the sport of fly fishing!
Rather than being a scientific discipline, designing flies is a subjective, theoretical, and borderline religious quest tied up with personal preferences and experiences – and not least blind faith. There are, however, a series of trigger mechanisms that have been fairly well documented by biologists. For instance, certain colors can have a tendency to agitate certain species of fish and triggering bites in certain periods of their lives. And (even though some exaggeration may be involved) we have all heard stories about big finicky trout that will reject a mayfly pattern, if it doesn’t have the right amount of tail threads. Well, you get the big picture…
Dura-Lar Sheets – A New Fly Tying Material
While experimenting with a series of new gobius patterns for sea-run brown trout, I came across a new material (Dura-Lar sheets). These transparent polyester film sheets didn’t really belong to the world of fly tying. They belonged to the realm of graphics, arts, and printing, but they gave me bright idea. Why not replicate the real prey items with photo-realistic precision? What could be more convincing? With a handful of Dura-Lar sheets in the printer and a thoroughly assembled Photoshop document with real photos of gobiuses, I started the job of developing my new series of gobius flies – printing neat little flanks that could easily be tied in to give the fly just the right proportions, colors, and markings.
The result was the 3D Dura-Gobius, and just like I had hoped, the fly looked very realistic. It had the right proportions, the right colors, the right glow, the right transparency (the one that small prey fish usually display) – and I thought it looked darn edible! The fact that the fairly rigid Dura-Lar flanks made the fly less lively than the kind of streamers, I normally use, didn’t discourage me, and it didn’t discourage the fish either. On my very first trip with the fly, I had five gorgeous and well-nourished sea-run brown trout up to 25 inches. And that was even before I started playing around with the fly’s movement pattern.
Getting the Movement Just Right
Later on, I found out that if I mounted the fly in a perfection loop, I could make it slide from side to side with each jerk on the line – something that makes trout go nuts. Also, I mounted Magic Heads (or action discs) on some of these flies to make them shimmer and twitch when being retrieved with steady pulls. As a result, I now had a fly (or more precisely a streamer prototype) that not only looked extremely edible – but also had some extremely enticing moves.
After having tested the first prototypes, new Dura-Lar patterns came into existence. All I had to do was get a hold of some pictures of herrings, sprats, sticklebacks, minnows, and sculpins, set up a Photoshop document, feed the printer some Dura-Lar sheets and ‘print some more flies’.
The Fly Tying Technique
The Dura-Lar sheets can be found in most graphics and arts stores, and they easily go in a standard color printer. What you have to do is set up a document in Photoshop or another editing program, use a digital clipping tool to cut out whatever prey fish you want to print, rescale the images to fit whatever hooks you want to tie on, and then make a full sheet of left- and right side fish flanks.
Once the sheet is printed, you simply cut out the flanks while leaving a little snippet in the front that may serve as a tying point. From here on, it is simply a question of tying some old-fashioned streamers – preferably in light and naturalistic colors, tie in the Dura-Lar flanks and then seal everything up with epoxy glue.
The Dura-Lar sheets come in several different thicknesses, but especially the .005” version is great for streamers. It holds up well, and with a retail price at around 20$ for 25 sheets, there is room for lots of experimentation.
On American Angler’s homepage, you can download your own sheet of prey fish flanks. This way you can easily get started producing some ultra-realistic Dura-Lar streamers.
Tying instructions – 3D Dura-Gobius
Print a Dura-Lar sheet with prey fish flanks and let it dry. Afterwards, secure a streamer hook in the vice, fasten the tying thread and wrap it all the way to the hook bend. Dub the tying threas with tan STF Dubbing and dub the whole length of the hook shank. Now, carefully clip out a left and a right Dura-Lar gobius flank and tie them in right in front of the hook eye so that they are completely level. Proceed to whip finish the fly, give the fly a go with some Velcro to give the dubbing some volume and you are now ready for the gluing.
Mix the epoxy components and carefully provide the inside of the Dura-Lar flanks at the way to the tail with a thin layer of glue. Sqeeze the flanks lightly together and proceed to give the head a thin layer of glue on the outside. When this first layer has dried up, provide the fly with a pair of 2mm Prismatic Eyes, and seal these with yet another layer of epoxy glue. When this has completely dried up, the fly is done.
3D Dura-Sprattus Step-by-Step:
1: Fasten the hook in the wise.
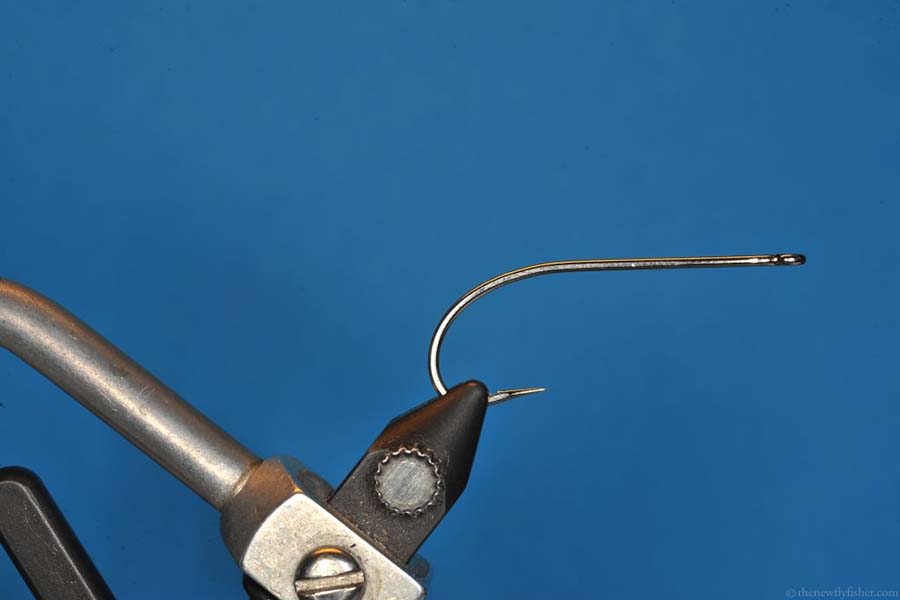
2: Secure the tying thread right behind the hook eye.

3: Tie in a section of white Craft Fur on the belly of the hook.
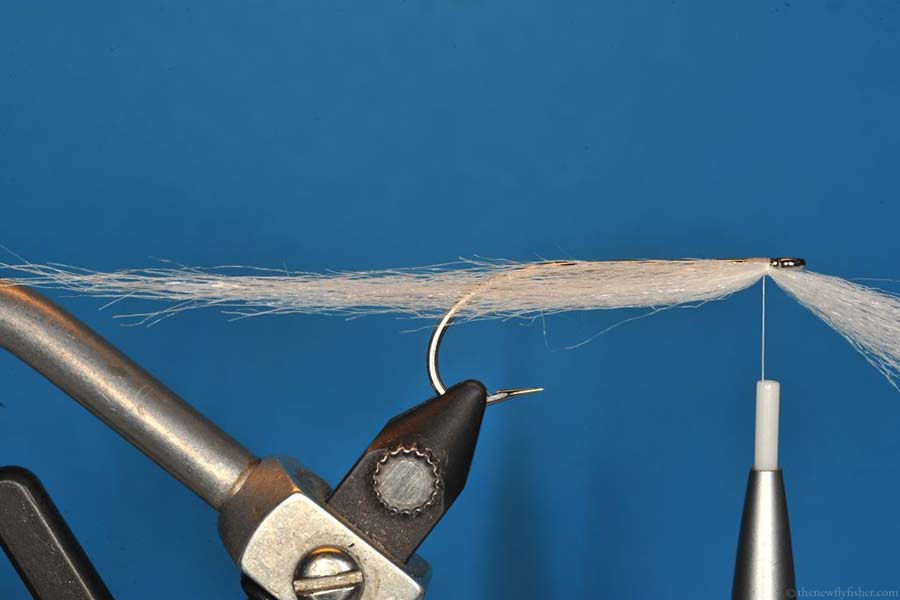
4: Tie in another section of white Craft Fur on top of the hook shank.
5: Tie in one last section of white Craft Fur – on top of the other.

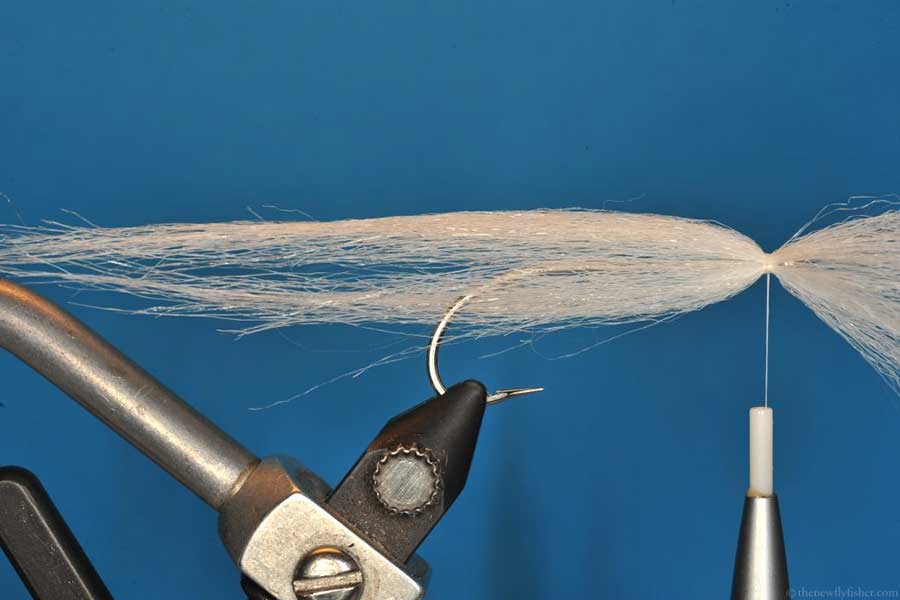
6: Now tie in a small section of silver-blue Sparkle Hair.
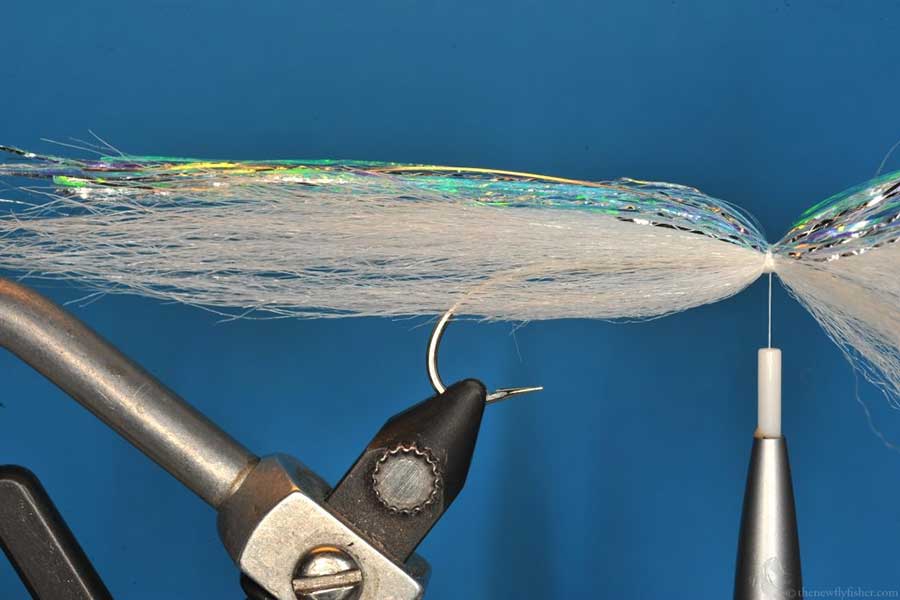
7: Tie in a section of grey Craft Fur on top of the silver-blue Sparkle Hair.
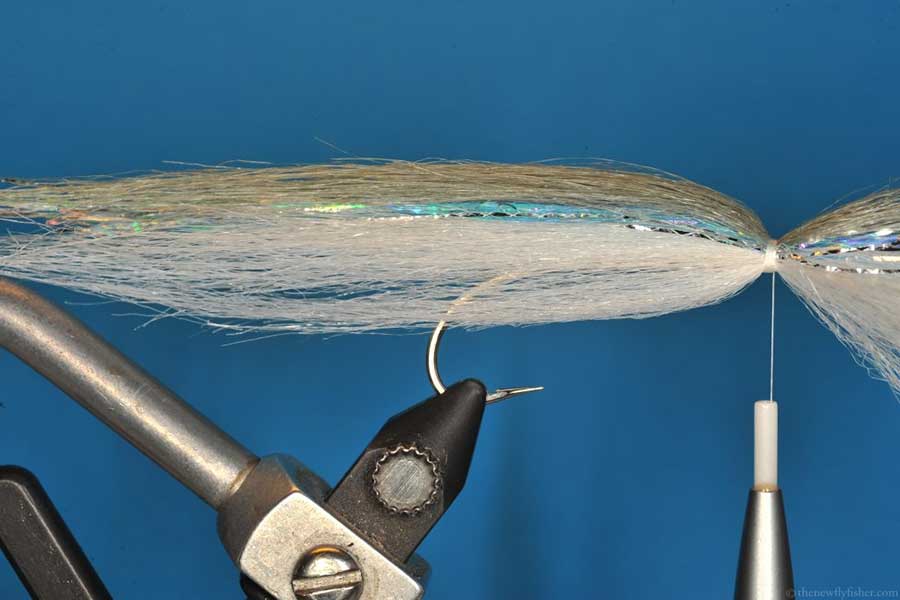
8: Trim all the excess material.
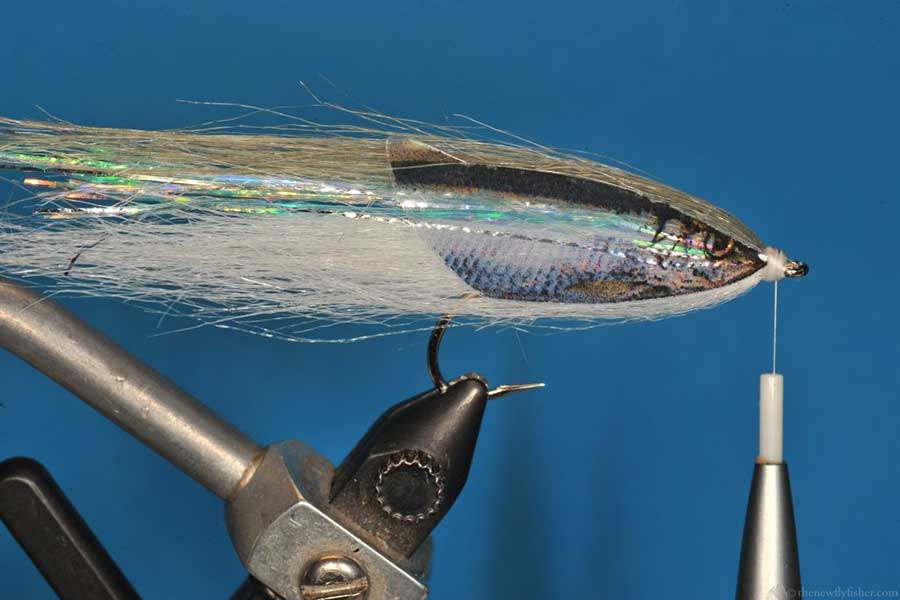
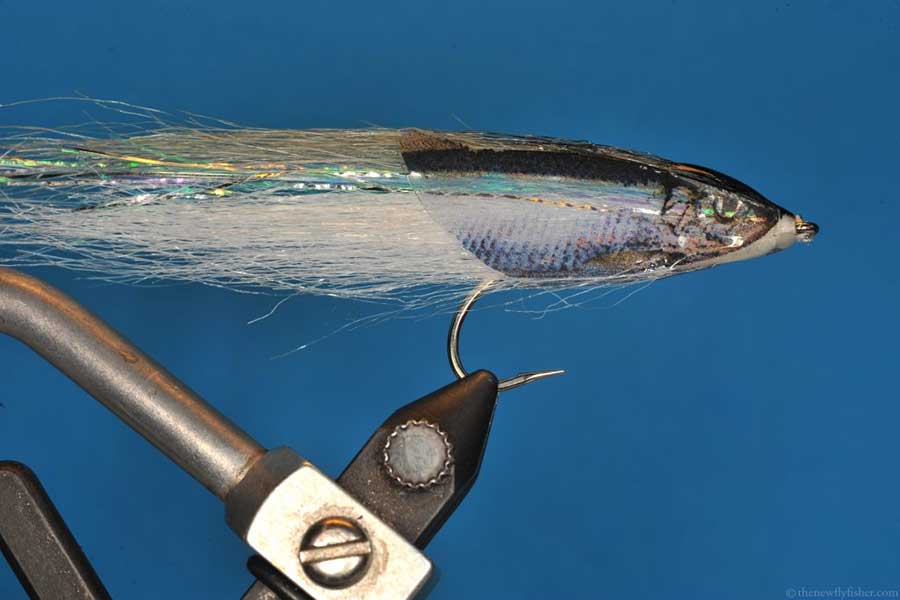
9: Clip out two Dura-Lar sprattus flanks (a left and a right side), and tie them in. Then whip finish the fly.
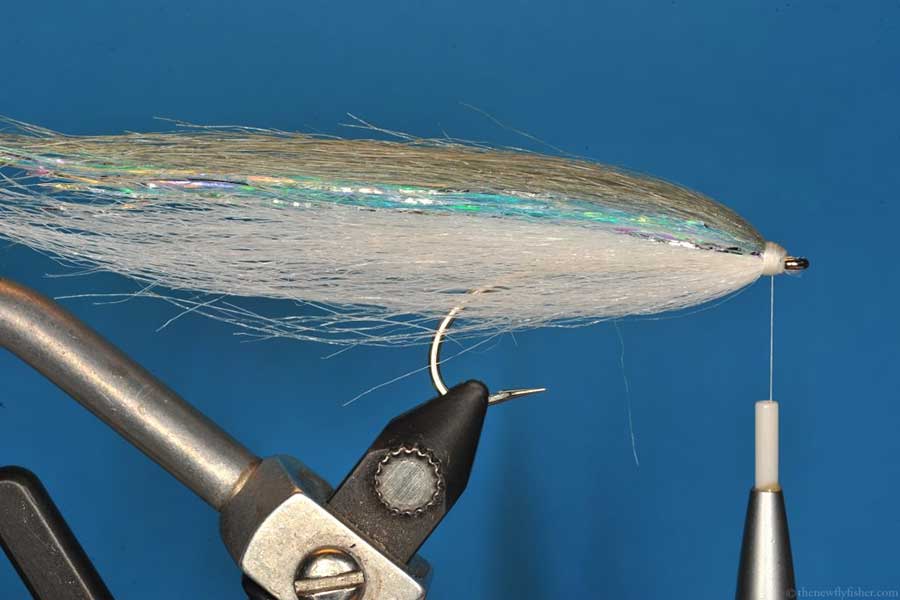
10: With a black marker pen, paint the upper side of the fly’s head as well as the front section of the grey Craft Fur.
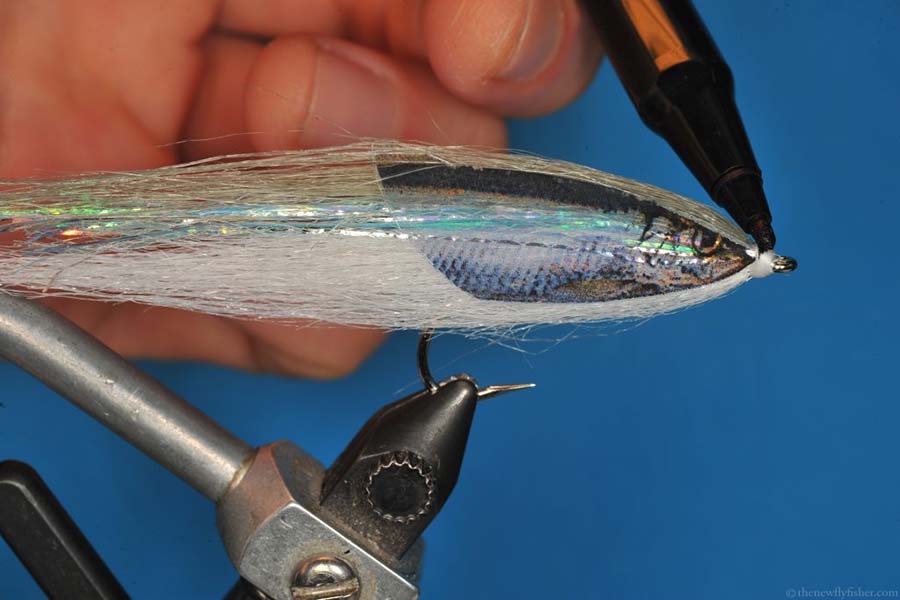
11: Apply a layer of 5-minute epoxy glue to the head section of the fly.
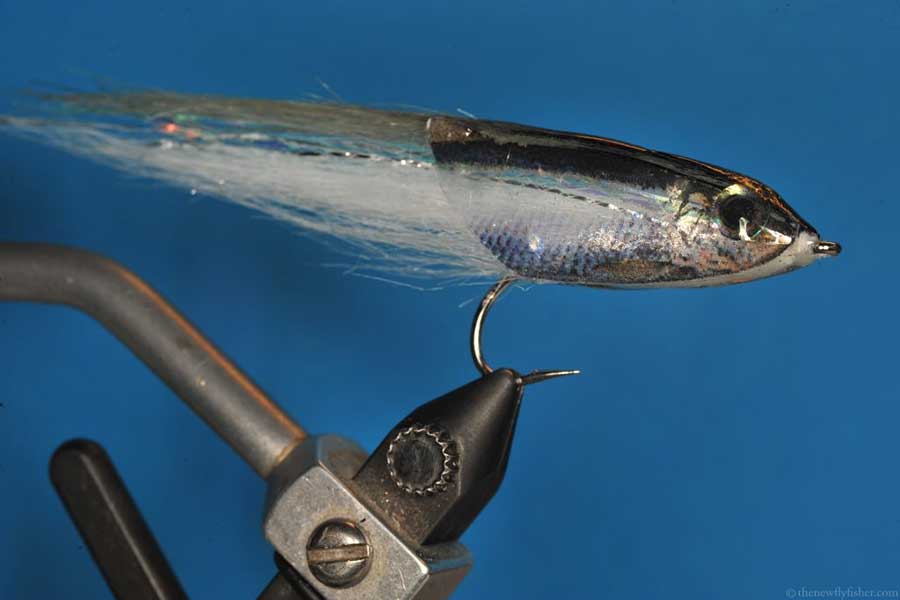
12: Glue on a pair of 3D Eyes and apply a thin coating of epoxy glue to the whole length of the Dura-Lar flanks.
3D Dura-Gobius
Krog: TMC 777 #2-8
Bindetråd: Tan Uni-Thread 8/0
Krop: STF Dubbing – Tan
Sider: Dura-Lar .005 – Clear (with gobius print)
Øjne: Prismatic Eyes 2mm – Pearl
Hoved: 5-minute Epoxy glue
3D Dura-Sprattus
Hook: TMC 811S #1/0-4
Tying thread: Uni-Thread 8/0, White
Body: White Craft Fur
Flanks: Dura-Lar .005 – Clear (with sprattus print)
Eyes: Prismatic Eyes 4mm – Pearl
Head: 5-minute Epoxy glue